
5.1 – Lighting Tips
Lighting is one of the last things that I work on in my level design. It is also one of the areas that I spend the most time in. Before getting too deep into lighting your level let's cover a few lighting tips.
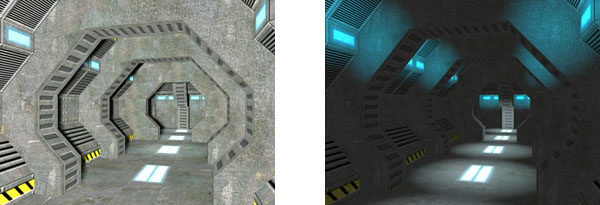
Tip #1 - Rarely use Pure White Lights
Light is made up of color. In fact, all the colors are present in what we call "white light". Objects both adsorb and reflect color. The colors we see are the colors that are reflected. This means that colored light is all around us.
Gamestudio, like most RT3D engines, does not allow color to be either absorbed or reflected in any way. Therefore we need to simulate this ourselves. One way to do this is by not using pure white lights. Instead use a little color from time to time.
Tip #2 - Use Soft Lights
In my opinion it is better to use several soft lights than one big glaring one. With soft lights you have a lot more control over what gets lit, what does not and how much. Huge, bright lights tend to wash out your textures and are generally too harsh.
Tip #3 - Use a Basic Level Ambient
I never completely light a level using only level lights. One of the first things I do is set a basic ambient for the overall level. The amount of ambient I set depends on how dark I want unlit areas to be. Setting level ambient sets a mood for the entire level as well as pre-lights everything. Now you can use level lights as needed in order to enhance mood, cast shadows and brighten areas as needed. You set a level's ambient by going to File>Map Properties and clicking on the "Sun" tab.
Tip #4 - Try Not to Use Sunlight
I don't know about you, but I have never been satisfied with the shadows and lighting created by pure sun light and I have found that I have more control over lighting and get better results when I use standard level lights. As a result, I rarely use Gamestudio's sunlight. I would consider using sunlight for large outdoor scenes, but never for an indoor scene.
Return to Part 5 - Let it Shine!
Go to Part 5.2 - Where to Place Lights