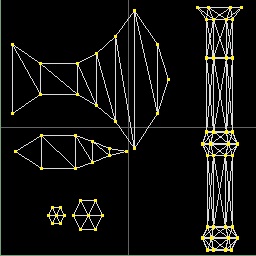
Your mesh is ready, but it has no textures applied to it.But first you need to unwrap your model. Your texture is a 2D image but the mesh is a 3D shape with many faces. Unwrapping means specifying which triangles of the model corresponds to which area of the texture. By unwrapping we create an UV map. Every vertices on your model has a counterpat on the UV map. An UV map looks like this:
Let's see how it's done.
Before you start to work, you need something to work on. Let's create an empty skin. To do that go to Edit->Manage Skins. Skin manager will show up:
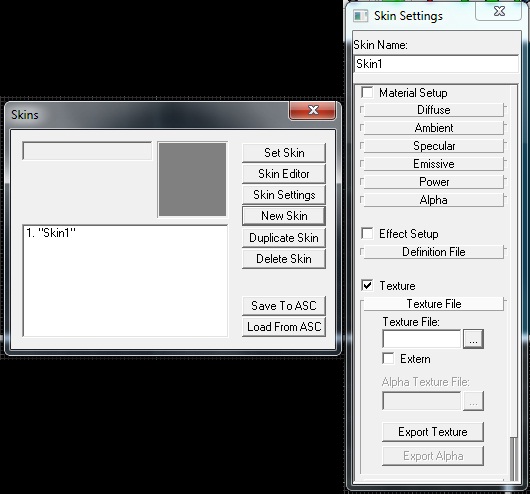
Click on the New Skin button and the skin settings window, the window on the right in above screenshot, will appear. Check the Texture box. This will create an 256x256 black skin.
Now we have our blank skin, we can unwrap the model. Make sure you are in the Triangle Mode![]() and select all triangles of the model by either drawing a selection box around it or clicking the Select All
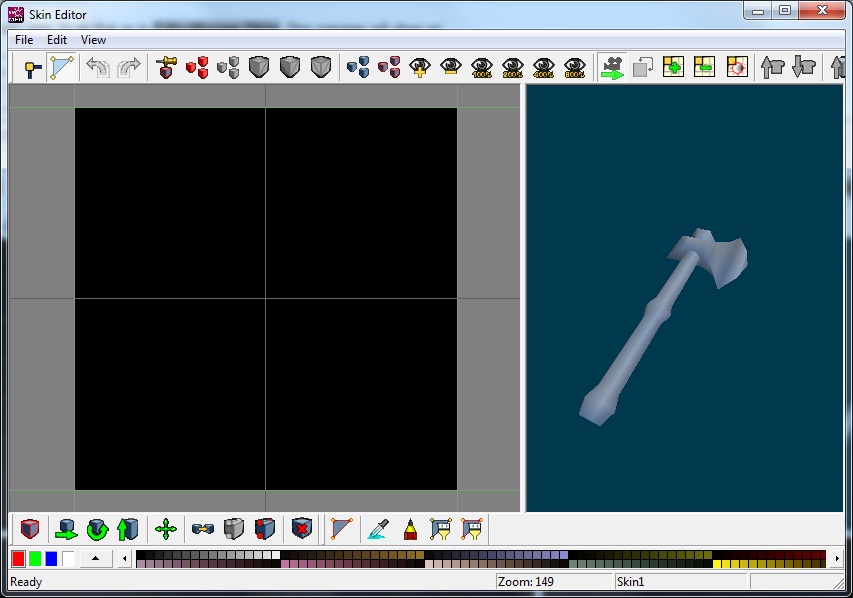
and select all triangles of the model by either drawing a selection box around it or clicking the Select All![]() button. Then click on the name of your skin in skin manager. In the screenshot above my skin name is "Skin1". While your model is still selected, click on the Set Skin button. It looks like nothing happened. That is because we are yet to specifty an UV map. Now, while your skin is still selected click on the Skin Editor button. The skin editor will appear:
button. Then click on the name of your skin in skin manager. In the screenshot above my skin name is "Skin1". While your model is still selected, click on the Set Skin button. It looks like nothing happened. That is because we are yet to specifty an UV map. Now, while your skin is still selected click on the Skin Editor button. The skin editor will appear:
The left part of the skin editor window is where you edit the UV map. We are going to create UV maps for the blade and handle spreately. First the blade of the axe. To work easier, we are going to hide the handle of the axe. At this point you can either close the skin editor, or if you are on a multi-monitor system, you can move it to another monitor. Back in main MED window, switch to Triangle Mode![]() and select one of the trinagles of the handle, then click on the Select Connected
and select one of the trinagles of the handle, then click on the Select Connected ![]() . This will select all triangles that are connectted to your selection at the time of using this tool. Now that the all triangles of the handle are selected, click on the Hide Selected
. This will select all triangles that are connectted to your selection at the time of using this tool. Now that the all triangles of the handle are selected, click on the Hide Selected![]() button. Only remaining visible part of the mesh is now the blade of the axe:
button. Only remaining visible part of the mesh is now the blade of the axe:
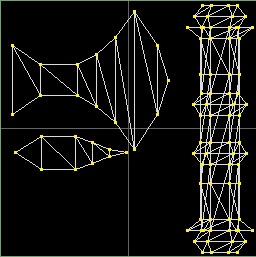
Now select only the top and the bottom faces of the blade, but not the front and back:
Note that you can add new triangles to your current selection by holding CTRL key while selecting, or remove triangles from selection by holding SHIFT key. These keys work both with single click selection and selecting by drawing a selection box. Now if you are done with selecting,make sure Skin Editor is visible somewhere on the screen. If you are closed it open it back by the steps explained above or by going to File->Skin Editor. If the Skin Editor is now on your sight, go to Edit->Create 6 Sided Mapping. You will be presented a small window which asks from which side you want to project your model on the 2D surface:
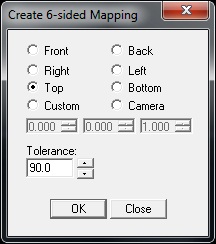
Remember we selected top and bottom sides of the blade? Now select the Top option and click OK. Do not just close the window, select the Bottom option this time and click OK again. You can now close the window. Did you see what happened in the Skin Editor? Your model is projected on the the skin from top and bottom. Because that the bottom triangles are facing down, they are not projected when you select the top option, this is why we are doing it also for bottom. Now you have this in the Skin Editor:
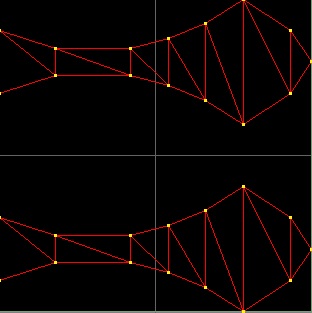
It does not look very good, and it cover alot of space. Besides, we want to use same texture for the both sides of the blade but we dont want to paint texture twice. Even if copy and paste that would be waste of space on the UV map. Therefore we are going to make them overlap and scale them down a little. Now switch the Selection Tool![]() in the Skin Editor window. And select only one of the pairs and by using the Move
in the Skin Editor window. And select only one of the pairs and by using the Move![]() tool, move the one on the other. Note that you can restrict movement by clicking on the Restrict
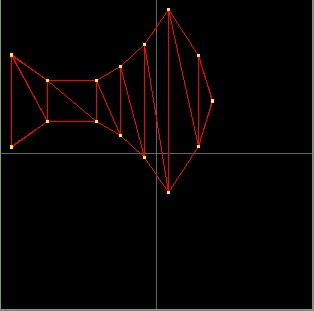
tool, move the one on the other. Note that you can restrict movement by clicking on the Restrict ![]() icon. It will toggle restriction modes on each click. Now if you made them overlap, select them all by drawing a selection box around it and scale them down. And place it somewhere proper on the skin. Do not forget to lift the restriction. You should have something like this:
icon. It will toggle restriction modes on each click. Now if you made them overlap, select them all by drawing a selection box around it and scale them down. And place it somewhere proper on the skin. Do not forget to lift the restriction. You should have something like this:
Repeat the same steps for the front and back sides of the blade and the handle of the axe. To start working on the handle, make sure you made it visible by click on the Show All ![]() button.
button.
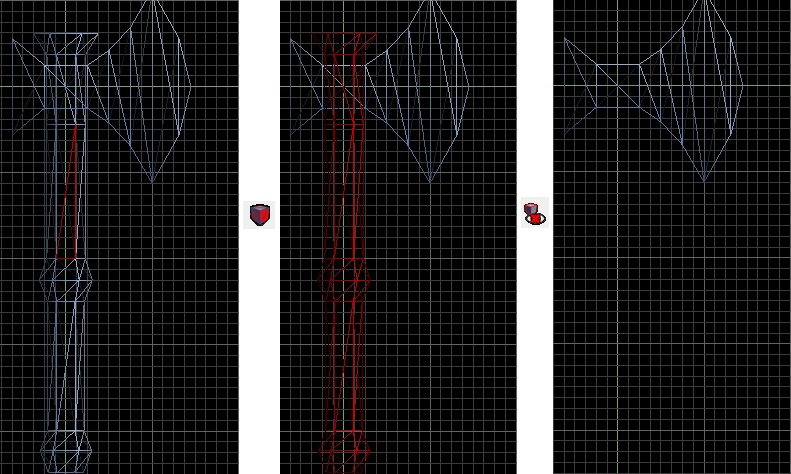
While you are repeating the steps for the handle you will notice that one of the top/bottom sides is flipped:
To easily fix that,in skin editor window, select one of the triangles from either of them, and click on the Select Connected![]() button. Now that the flipped one is selected restrict editing to vertical axis by clicking on the Restrict
button. Now that the flipped one is selected restrict editing to vertical axis by clicking on the Restrict![]() button. Then click on the Mirror
button. Then click on the Mirror ![]() button:
button:
Then overlap themas explained above.
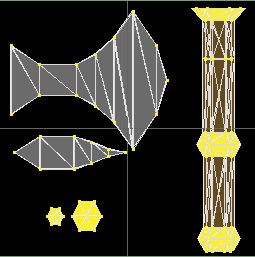
Now that you have your UV map ready, you can start painting a texture for your model in your favorite image editing program. Unfortunately this tutorial does not cover how to paint textures, however you cand find plenty of tutorials on the internet that explains how to create textures with the image editing software you are using. To make your easy, you can create a template for your texture by filling triangles with diffrent color and outlines using the Fill![]() tool and the color palette located at the bottom of the skin editor window. I created this as a template to know which part of the skin is where and to work easier with my image editing software:
tool and the color palette located at the bottom of the skin editor window. I created this as a template to know which part of the skin is where and to work easier with my image editing software:
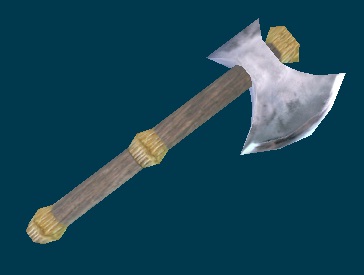
After creating your template texture, you can export it to an image format that is readable by your image editing software by going to File->Export->Current Image to BMP from the skin editor window. I painted this texture for the axe:
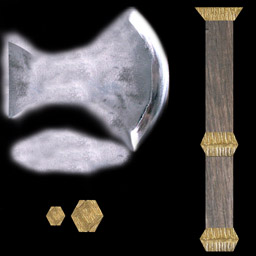
It looks like this in the MED's 3D viewport:
Congragulations! You have just finished your first model in MED!