You probably see terrains a lot of games. All hills, mountains, grassy plains, basically all landscape are terrains. This makes terrains essential for outdoor levels. Techically, terrains are a grid of vertices with diffrent heights.There are several ways of creating terrains for Gamestudio. We are going to see how it's done with MED.
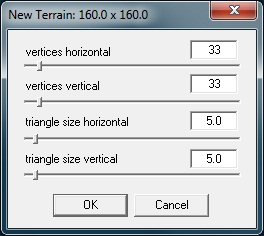
Okay, let's start with creating our flat base terrain. Open med and go to File->New Terrain. Clicking the empty paper icon (New) will not create a terrain but a model, so you have to do this from the file menu. "New Terrain" box will popup:
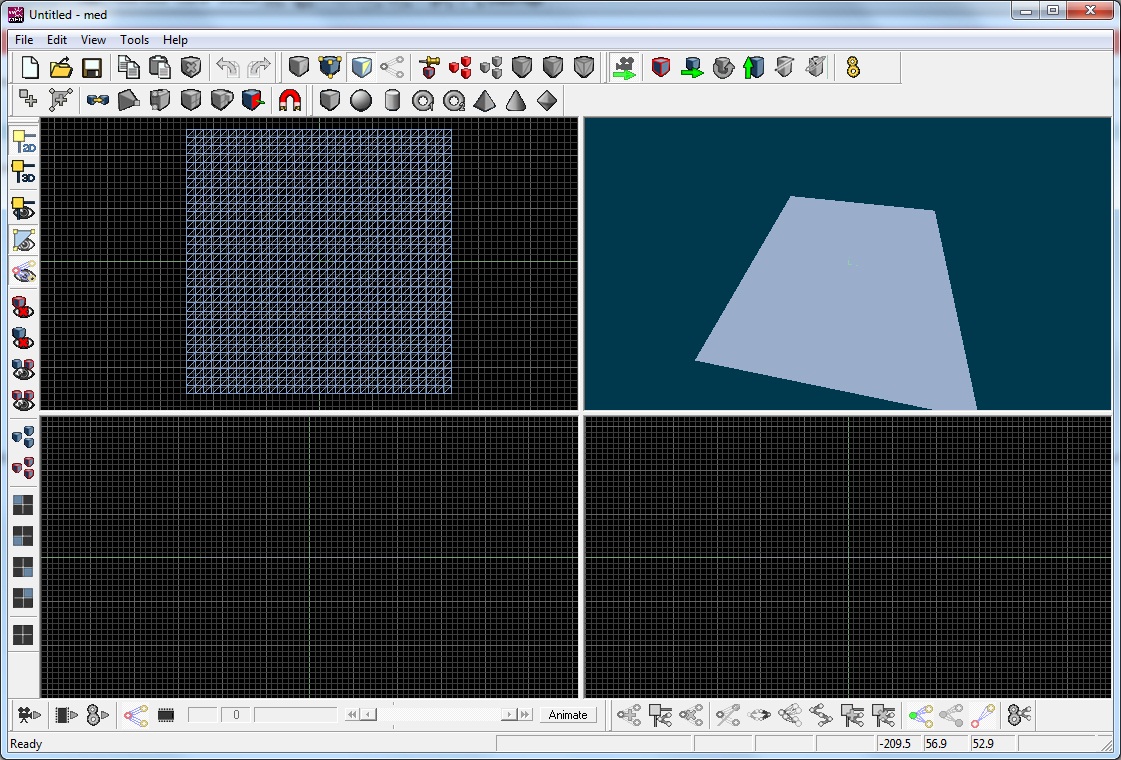
Vertex counts(vertices horizontal and vertices vertical) shows how many rows of vertices your terrain will have. Triangle sizes are the distance between these vertices. Triangle size will determine the size of the terrain, while vertex count determines the detail. For now, leave the values as they are and click OK. You will get a flat grid of triangles. You'll see that some features of the med like adding primitives,rotating,cutting,bones etc. are disabled. This is because your terrains has to preserve the grid structure. You can only move vertices up and down but not left or right. Terrain will always look like a grid when you look down from above.
If you decide to change the size of the terrain after you created it, you can do it by going to Edit->Change Terrain Size and Edit->Change Terrain Vertices Number.
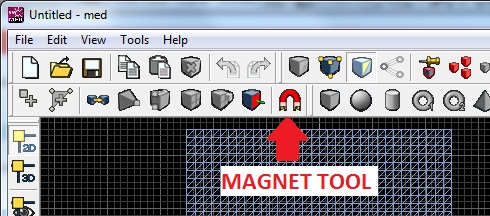
But it is not a very good idea to move all vertices up and down one by one to get the desired shape. We are going to use MED's terrain tools to modify the terrain. To activate the terrain tools click on the Magnet icon from the toolbar.
A toolbar will appear at the bottom of the window. This is the toolbar that we wil use to modify our terrain:
![]()
Now if you move your mouse over the terrain in top view or 3D view, some parts of the terrain under the mouse cursor will be highligthed.
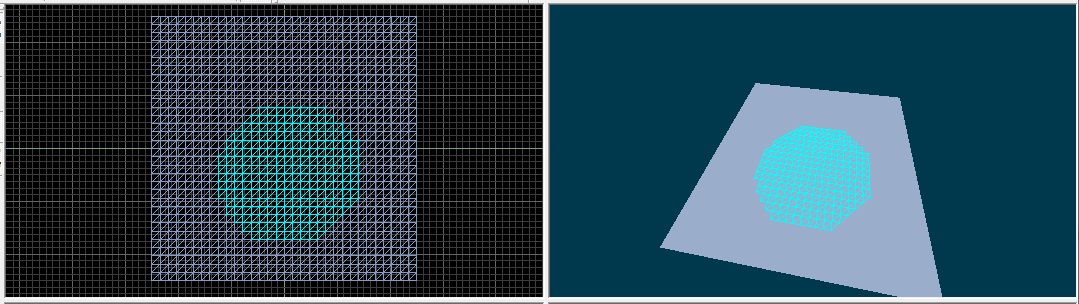
The circle that appears on the terrain is your brush. If you click on the left mouse button area that the the brush cover will be raised. In same way if you click on the right mouse button, this area will be lowered.
Now back to our toolbar. The toolbar is used to change the settings of the brush. All explained below:
Range is the size of the brush, larger values will make the circle bigger.
Repeat is used to determine the interval between consecutive
raising or lowering actions in miliseconds. If you click and hold mouse buttons to perform lowering or raising actions, it will repeat that action.
Step is the "power" of the brush. This setting determines how much the vertices move up or down.
Form is the shape of the brush. It determines how will terrain get raised or lowered.You canswitch to other forms by clicking the icon. Basically the icon shows how your terrain will look from side when you click on it.
Min Z value and Max Z Value is used to limit the hieght or deepness of the terrain. If you click on the checkbox next to them, limit will be active, and terrain wont go any deeper or higher than the value you entered.
Now you know what is what, go ahead and click on the terrain. If you think nothing is happening, make sure you click properly and hold the mouse button for a little while. Note that when you hold mouse button on 2D views it will update the 3D view when you release the mouse button, but it will update in realtime if you click on the 3D viewport. Expirement with diffrent values and forms. You may want to use a larger terrain to expirement on, if so, click on the File->New Terrain and create a terrain with more vertices and larger triangles. Create a terrain using the tools as explained. Once again, do not forget, the left mouse raises the vertices and right mouse lowers them.
Now you are familiar with the tools of terrain crafting in MED, but you encountered a problem. You nearly get the exact shape you want but that one vertex or a small group of vertices stand a little higher or lower than where you want them to be. You cannot use the brush, it is not very preciese and while you try to fix those vertices it also moves other vertices that was already fine. But of course, there is a solution for that.
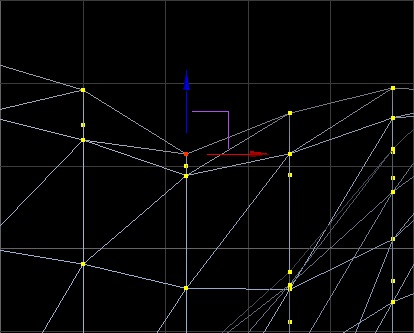
To make your fine tuning on particular vertices, go in to vertex mode by clicking the Vertex Mode ![]() button. Then select Move Tool
button. Then select Move Tool![]() from toolbar. Select your vertex by clicking on it or if you want to select multiple vertices, click and drag to draw a selection box around your vertices. Once your vertex or vertices are selected, move them up or down and move them to desired position.
from toolbar. Select your vertex by clicking on it or if you want to select multiple vertices, click and drag to draw a selection box around your vertices. Once your vertex or vertices are selected, move them up or down and move them to desired position.
For example, i wanted this part of terrain to be smooth:
But it ended up a little sharper than i wanted. So i moved it up a bit and made that part of the terrain smoother:

We are now done with creating the terrain's shape. But our terrain is not yet complete.