Here we are at the last part of this tutorial, Animating!
Most of the time, in video games, animations consist from frames. Frames are actually different poses of the model, generally with a certain time interval. For instance frames of walking animation, has poses of the model in diffrent moments of walking action. Game engines takes this poses, and by blending between them plays a smooth animation. If it was not to blend between frames, your animation would look like it's jumping from pose to pose. Anyway, we before getting side-tracked let's add frames to our model.
When we add frames, all frames will have the same default pose, the pose we built the model in, then we will edit the pose of the model and animate a walk cycle.
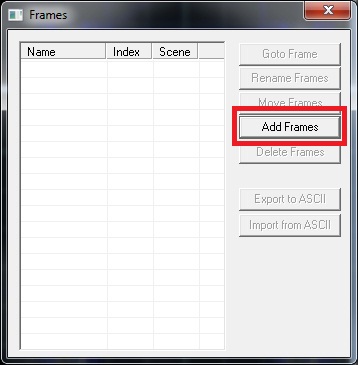
First go to Edit->Manage Frames. You will be presented with the window below:
Click on the Add Frames button.
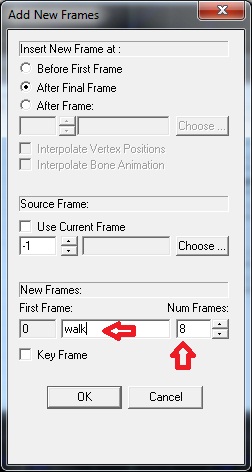
We will create a 8 frame walking animation, so edit the fields as shown above and click ok. Your frames will be added to the list:
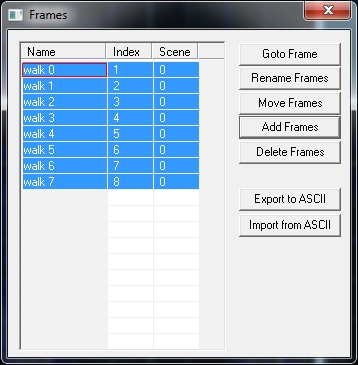
The red border around frame name indicates the current frame you are working on.
That's it. We added our frames, now we can go on to change pose of the model.
First, go to Bone Mode by clicking the Bone Mode![]() icon from the toolbar. We are not going to edit the shape of the skin in anyway while animating, we will only rotate and move bones, and since we attached all vertices to bones, vertices and bones will move too.
icon from the toolbar. We are not going to edit the shape of the skin in anyway while animating, we will only rotate and move bones, and since we attached all vertices to bones, vertices and bones will move too.
You will see another toolbar right next to bone toolbar, the Frames Toolbar:
![]()
In this part of the tutorial we are going to focus on this toolbar. Now make sure you are in Animate mode. When you are in animate mode, the Animate button on the frames toolbar turns yellow. You can toggle Animate mode by pressing on this button. Now if it is not already yellow, click on it to turn on the Animate mode. Toolbar buttons and controls will become active and Animate button will turn to yellow.
![]()
By using scrollbars and arrows you can switch between frames without having to open the manage frames dialog. Now we are on the first frame of out walking animation.
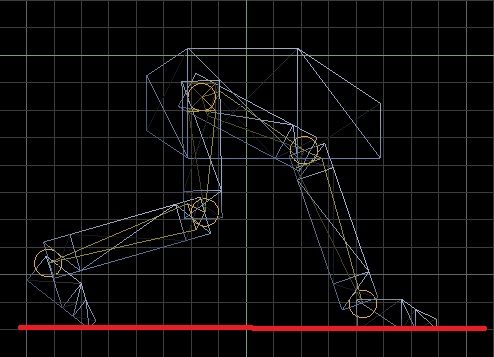
All we have to do is pose the model as if it was walking, in bone mode, using rotate and move tools:
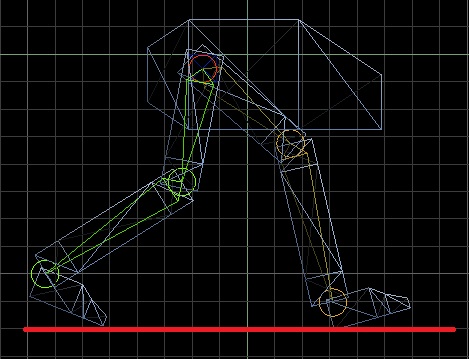
I just rotated bones, as if posed my model as it was walking,I am using the red line as my imaginary ground to work easier.
![]()
I switched to next frame "walk 1" clicking the arrow. Now i will change the pose of my model, as if a little time passed while it is walking:
And repeat all these steps for all 8 frames:
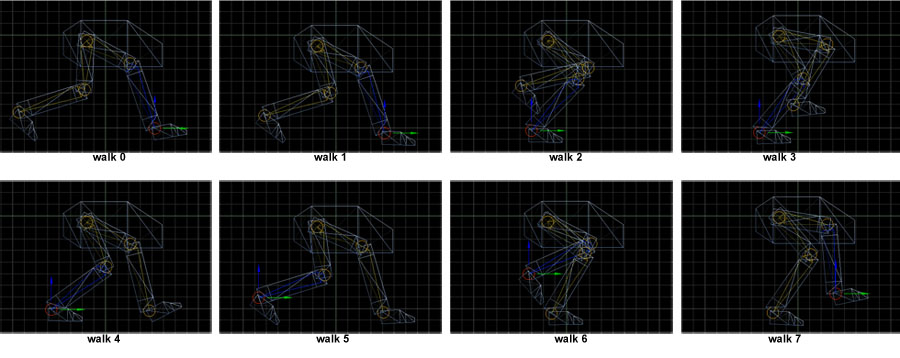
Here is the preview of the finished animation:
You can preview your animation by either going to File->Engine Preview or clicking on the Play Cam![]() button on the frame toolbar. No that you need to save your model first to take an engine preview.
button on the frame toolbar. No that you need to save your model first to take an engine preview.